
Image Based Lighting Part 2
- jimht3
- Jun 23, 2021
- 2 min read
Now, we are going to create a new default material in the scene. You can choose whichever HDR image you want to here, but it does need to be an actual HDR image, and not simply a panoramic image. Here are the settings:

Assign this material to the "Global Sky" object. Now, to create the next material, we need to create a modified version of the HDR we used for the Global Sky. Go to Window menu, and open up the Picture Viewer. From the Picture Viewer file menu, select Open Image... and then select and load the HDR image. Then, over on the right side of the picture viewer, select the Filter tab, and use the following settings:

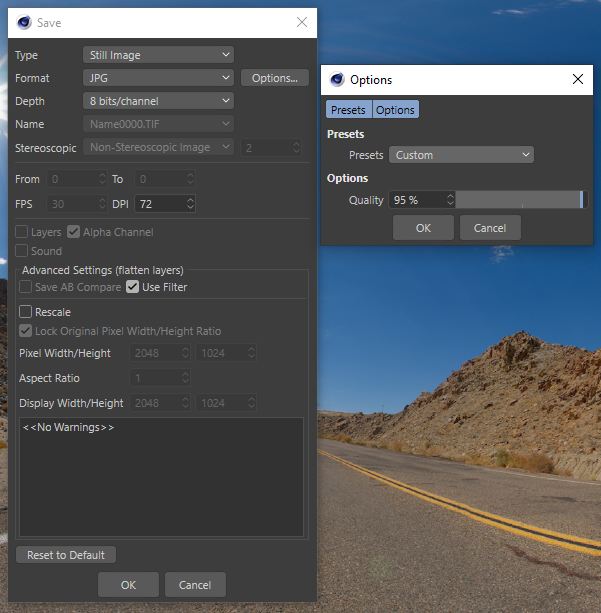
You don't need to be precise here - this image will be used as the visible sky only and have no effect on the quality of the lighting, so set the look you desire. In general I want the sky to look a bit darker, and the colours a bit more saturated than they might otherwise look in the final render. Now, in the Picture Viewer File menu choose Save Image As... and save the image as a .jpg file. Be sure to check off the "Use Filter" option.
OK, now we are ready to add another Default Material to the scene. Here is the setup:
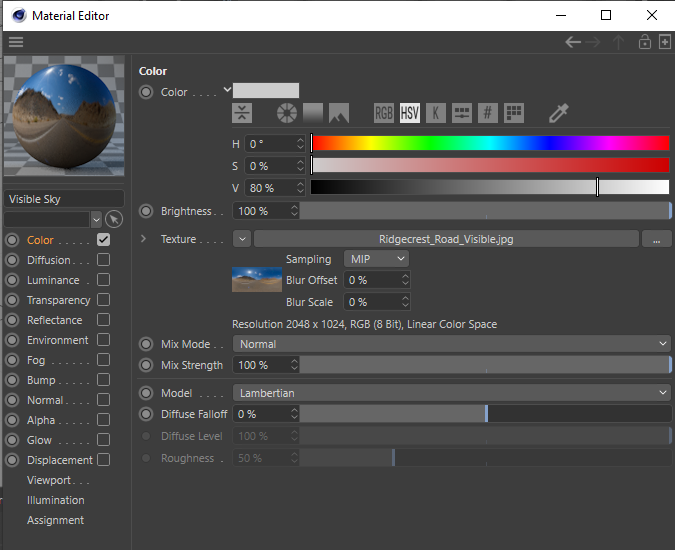
Assign this material to the Visible Sky object. Now we are going to add a third Default Material to the scene. This has a couple of different sections:


The Polygon Light option in the Illumination section is the important one here. This tells the renderer that this material is important and to send some rays in that direction when evaluating the lighting for the scene. Assign this material to the Sun object.
The final step in this process is to orient the Pivot Camera so that it is pointing at the location of the Sun in your HDR image. Highlight the Pivot Camera object in the asset manager, and click the little "use" widget to the right of the object. Under the "Camera" submenu in the perspective view, make sure that the Navigation method is set to Object. The perspective view will now be showing you the output from the Pivot Camera. Rotate the view until it is pointing directly at the sun, centered in the frame. This will ensure that the Sun object is correctly positioned in the scene so that its light will be coming from the correct direction.

You can then switch back to the Scene Camera to position it in the world as you please, and the Pivot Camera will be unaffected by your camera moves. If you switch HDR images, be sure to switch to the Pivot Camera view to reposition it to look at the Sun again.
You can now use this rig in any Cinema 4D scene and make use the Physical Renderer and reflectance mode rendering. I mentioned at the start of this tutorial that textures would need to be adjusted to make use of this rendering mode. The process is fairly simple to convert a texture so that it looks correct when used with this kind of lighting setup.
Continued in part 3...
Comments